

Valenti Revo Jewel Taillight Install (RX-8) - Tutorial
Because fogged lights don’t suit a car with soul.
Why This Mod?
My passenger-side taillight had been fogging up for months — a sad reminder that OEM parts don’t last forever. Replacing it with a new OEM unit would’ve cost around €400; even a used one starts at €150. So I decided to upgrade with intention, not desperation.
After researching various LED options — from smoked lenses to heart-shaped monstrosities — I chose the Valenti Revo Jewel set. It’s one of the few LED kits with an E-Mark, meaning it’s street-legal across Europe, including Luxembourg. No sketchy paperwork, no compromises.
Another plus? Plug-and-play wiring. No splicing. No headaches.
I bought my set from Greenfuchs, a BRZ/GT86 specialist I met at JDMania. He made sure I got the correct version for my Series 2 RX-8, since sealing material and bolt lengths differ between S1 and S2/S3.
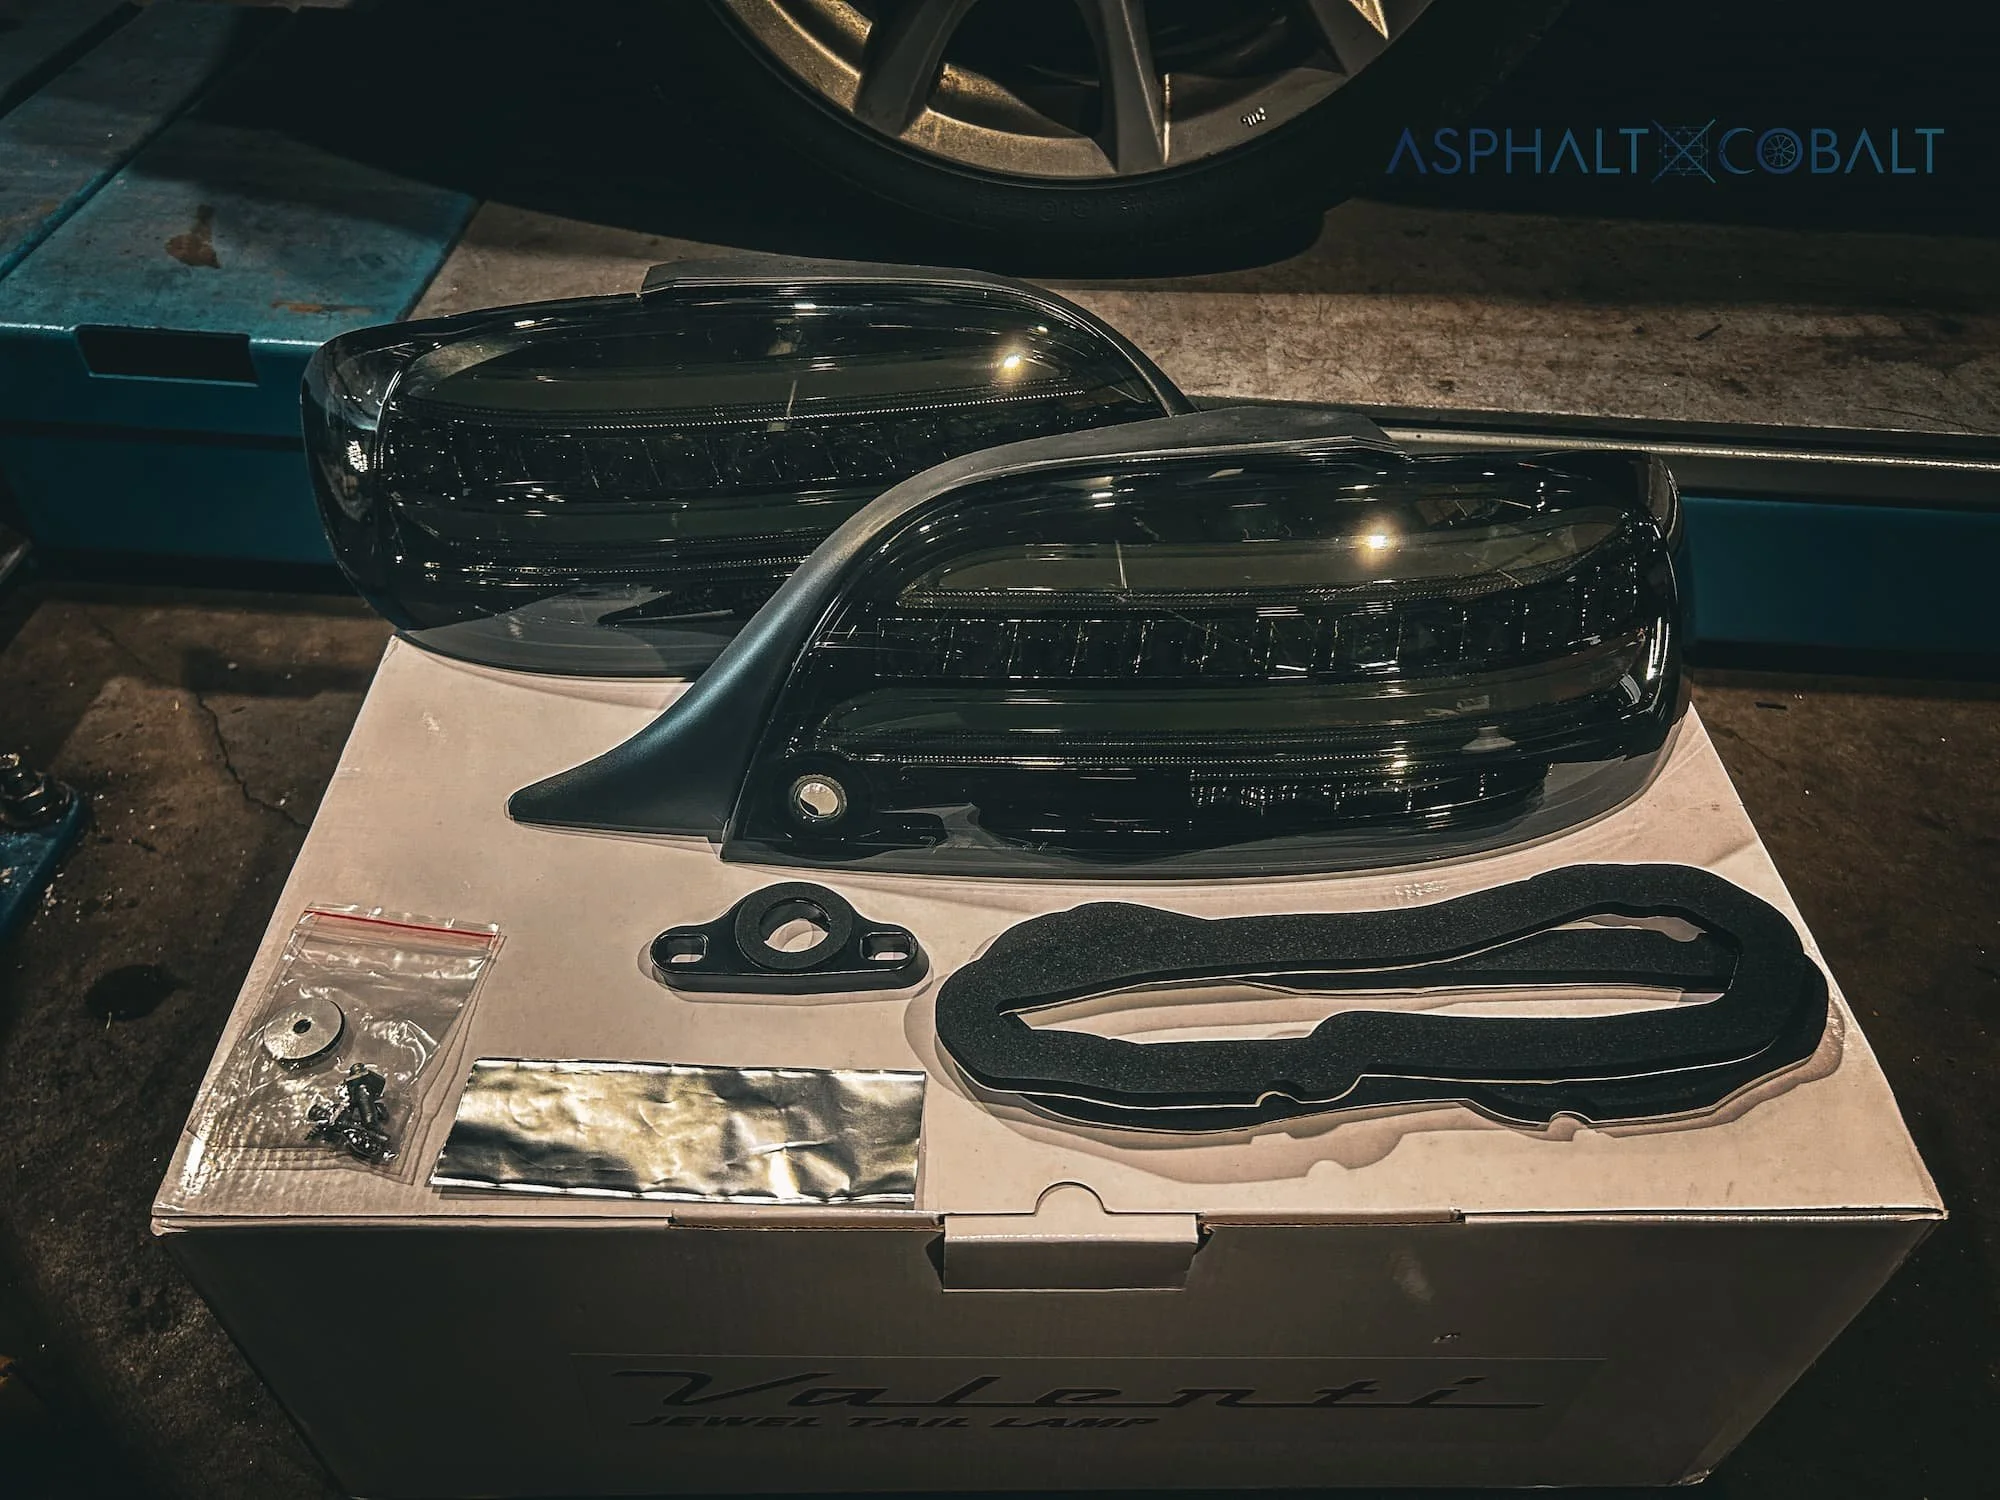
Valenti Revo Jewel Taillight Kit for RX-8 S2
Unboxing & First Impressions
The kit includes:
2 taillights
Foam and aluminum seals
Bolts
Trim
Spacer for the keyhole
Mounting hardware
One catch: no English instructions. Only beautifully packaged Japanese instructions were included. I translated them — and here’s the full process.
Tools You’ll Need
Long-nose pliers
Socket wrench with 10mm + 13mm sockets
5mm hex wrench
Phillips screwdriver
Clip remover — get a proper metal one
Optional: magnetic work light
💡 Tip: JDM trim clips are notoriously fragile. A metal clip remover is a smart long-term investment. Keep spare clips on hand — you'll need them eventually.
Prep Work
Disconnect the battery. You’re working with electrics — don’t skip this.
Remove trunk linings, including the jack/towing hook cover.
Unplug the OEM taillight connectors (three per side).
Be gentle — pinch the clip and pull. These break easily.Remove the three 10mm nuts holding the OEM light on the driver’s side, five on the passenger side. Don’t lose the nuts!
Pull the light out from the outside — slow and even.
Clean the taillight housing! Its usually filthy …
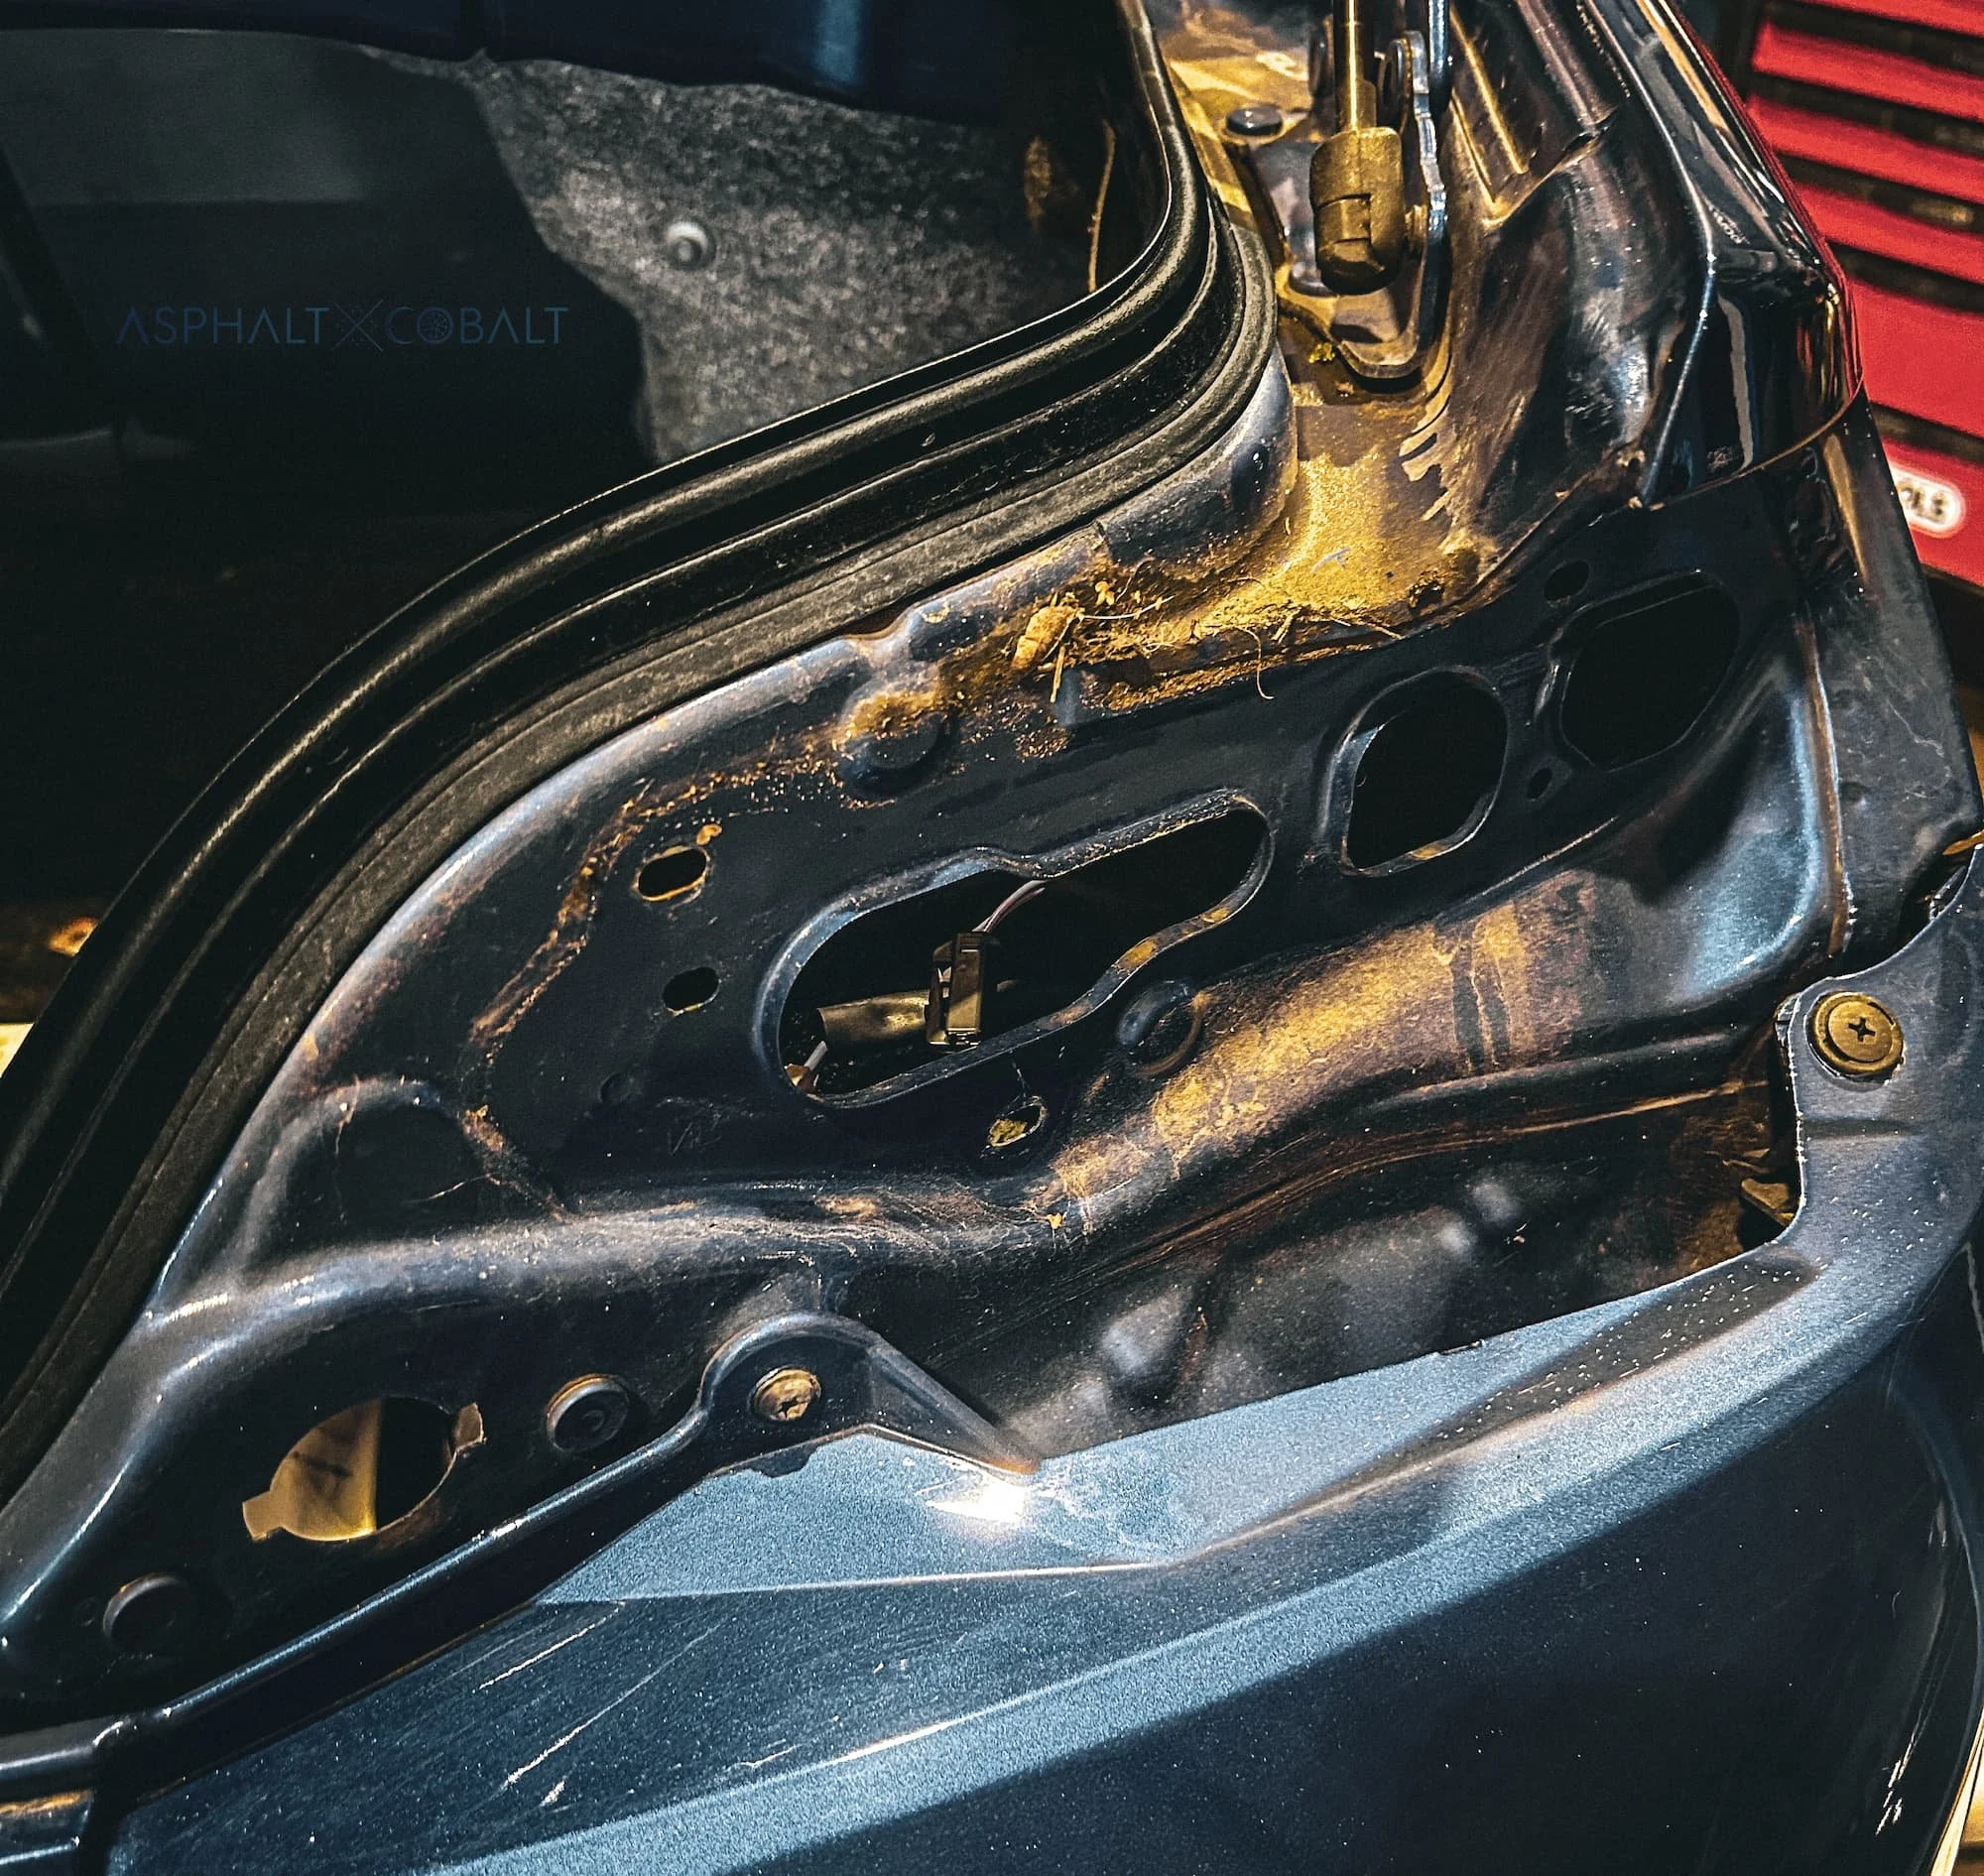
Dirt amasses quickly in the housing.
Test Fit & Prep
Compare the OEM and Valenti connectors to ensure fit. Check for bent pins. The build quality on Valenti is excellent, but it’s always smart to double-check.
Now prep the new light:
Install the stud bolts with a 13mm socket. Be mindful to place them correctly (you need to swap two bolts)!
Short end goes into the light; long end sticks out. Add washers.Install the lower trim piece onto the taillight housing..
Use the 4mm screw in the center, 7mm screw on the side.Attach the foam seal to the back of the taillight using the OEM light as a guide.
Apply aluminum seals to the car’s body where the light mounts.
Use the large foil for the wide area, the small one for the keyhole recess.
⚠️Critical: The sealing process must be precise.
No gaps. No overhang. No folds.
If the foam isn’t applied cleanly, you will get leaks.
For S2 models, adjust the keyhole:
Pull back the key cylinder slightly.
Insert the spacer.
Re-secure using the included hardware.
Install the New Light
Option: Sequential or standard blinkers?
I chose sequential to match my side repeaters — no change needed, it comes pre-set. For the standard blinkers simply connect the two blue wires on the taillight together.Insert the taillight into the body from outside.
Tighten with the three 10mm nuts.
Reconnect all plugs.
💡 Note: Be careful to choose the right plugs, since you only need three out of the five provided depending on your car’s generation.
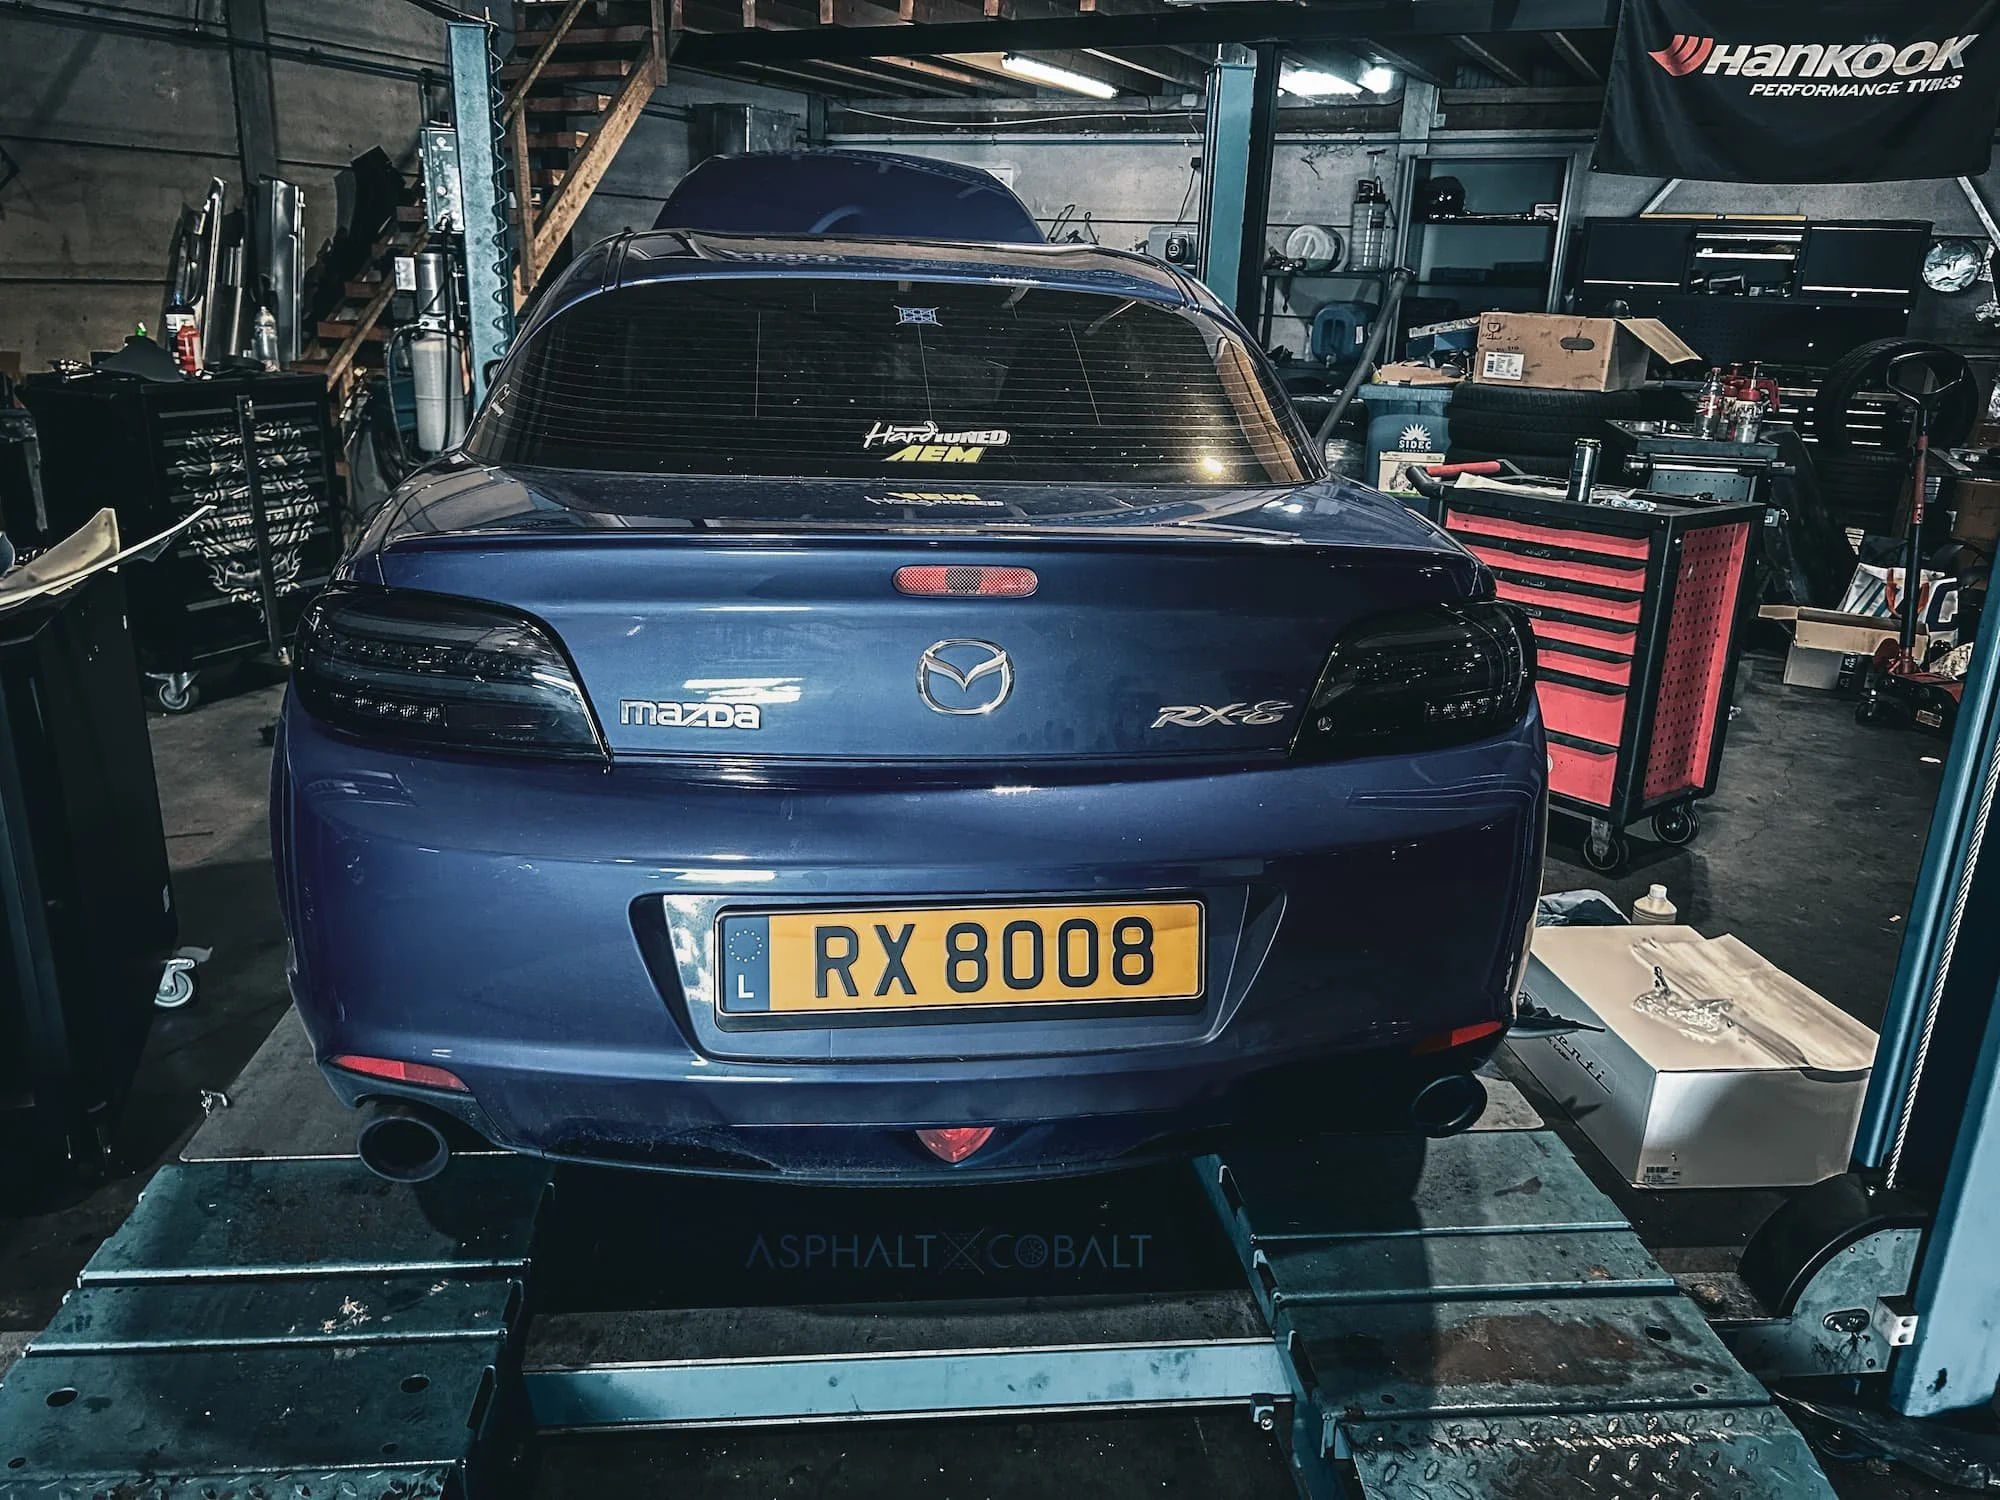
Finished taillight install.
Final Checks
Reconnect the battery.
Turn the ignition ON without starting the engine and check:
Running light
Brake light
Turn signal
Reverse light
If all works — you’re good to reattach the trunk linings and close up!
Done.
It’s a simple mod on paper, but one that transforms the rear end of the RX-8 — and adds peace of mind with street legality and reliability.
Built with intention. Driven with obsession.